Rearranging the Cabinet

The microwave stand that I turned into a towel holding unit has not been updated in a verrryyy verryyy long time. In fact it was probably 2 roommates aka 2 years ago since it has gotten a thorough upheaval of decor. Which I think is necessary when trying to keep things fresh and fun. 

I saw this cabinet which is a lot like mine on A Beach Cottage.


The cabinet shelves were decorated like this originally:

I know that I really need to paint the ceilings in here... probably when I buy all of the paint for my master bathroom this guy will go under the brush as well. The strips are horrible.

With the addition of some of my new finds from thrift storing and treasure hunt I pretty much redecorated the whole unit:


I love to decorate with books! Lately I've been turning them around to reveal the pages and not the spines. I found that great frame at Goodwill and it fits in well with my decor! See that anchor mason jar? Totally painted that myself to look like a ball jar. Cha-ching!


I found that great metallic starfish at Ross several years ago and it's just been floating around in random spots in the house. It was certainly deserving of it's own home. I also found that adorable wine crate from Napa Valley at Goodwill. I heart the Goodwill. The mirrors are an attempt to bounce light a little bit since it's such a dark hallway. I think I need to find a way to hang them up though.... hmmm....


I swapped out the shell bowl for a clear vase with shells in it and added the tall candlesticks to the background to add some height.

My new decorations are similar to the beach cottage picture but I added more color because mine is shorter and deeper then the other one. That and I took my pictures after dusk because I work until 8pm so it's hard to catch during the day. But I think it's a good improvement over the other decor! It fits better into the vintage and repurpose looks that I've really been into lately.


Gives me motivation to continue updating the decor in different areas of the house too! What do you think? Better or worse then the old set up?


DIY Friday! Homemade Blue Ball... Jars


Yayyyy for another....


Recently I was blog stalking  reading through Shabby Creek Cottage as well as The Single Nester blogs and I came across this amazing idea on how to create your own blue Ball Mason jars! Large perfect Mason's usually run- even at Salvation Army- up over $3 a piece. Which is quite a lot really when you think about it. I love how they look though!


Oh gracious my counters are lovely. But even their dusty rose-ness can't hinder the greatness of the blue Ball Jar! So I decided since they were so hard to come across I was just going to have to make my own. Which I'm cool with. I followed The Single Nester's recipe for mixing up the materials needed to paint the clear jars like the one on the right. 

  • 1 tsp water
  • 1 tb Elmer's school glue
  • blue and green food coloring (1 drop green 4 drop blue was my favorite)
I did figure out that it starts to separate after awhile so adding more glue is a good choice if necessary. I definitely don't recommend adding more water though. Then it looks weird.

I mixed up all of my ingredients in a red Dixie cup (I'm a college student so of course I have some of those!) and I used a sponge brush to paint the mixture onto the jar. You can get a pack of 4 for .97 cents at WalMart  which is good because they are totally ruined by the glue. 


You can pretty much see the streaks from the sponge brush when you're painting but once it dries...


It looks great! Of course it's not the exact same blue clear glass but it has the same effect and only costs .40 cents. I think it's pretty great myself! Thanks to the Single Nester for the great idea!


A Bicycle Built for Twooooo!

One great thing about living in Colorado is the beautiful scenery, perfect for biking, hiking, camping, fishing, and all other sorts of outdoor verbs. It's fantastic and I love it. (i also love sunscreen. Just saying.) One thing that Justin really enjoys is extreme mountain biking. He has a great group of friends that he joins on awesome excursions. They even get to have outfits! That is probably the most important part of the whole deal. Anyways. 

I wanted to put something in the house that attributed a bit more to his love of bicycles and my love of vintage and cozy pieces. But I have to do it on the cheap. Especially now that I will have to have surgery on my ovary it's important to stay cheap. I wish I lived in a land of free healthcare some days. But moving forward, I had this idea to make my own vintage pictures!

First! I had to do a little Google-ing. I also figured out how to take a screen shot. I am becoming such a savvy blogger these days.


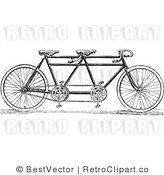
I searched for tandem bicycle clip art so that way it would pop up with black and white photos that would be easy to run through the printer and not get to crazy weird in the process. 

Second! I picked out a few that I actually liked, because that is kind of important in the whole creation process.

There was a lot of them to chose from so I decided to broaden my search to a few other bike types as well. I went with vintage, bone shaker, and 1920s bike just for ideas on what Google would turn up.

Third! I bought these cheap frames that already had mats in them from WalMart (because I don't have an IKEA. Depressed moment. Ok. Recovered) they were only $3.00 a piece. I used some brown stamp pads that I had from when my Mom cleaned out her craft room so that I could give them an "aged" look. Sort of like they had been in a magazine for a long time. 


I really liked how they turned out! I thought they looked great and were a lot of fun to make. Plus Justin appreciated the nod to his passion and not just mine. He's such a lovely fellow. Now all I need to do is get the new shelves hooked up in the office so I can figure out where I want to put things. Sadly the whole office has only the same two things on the walls. Boring. 


Linked this guy to: Tatertots and Jello