Showing posts with label gallery wall. Show all posts

The Wonky Wall: Living Room

I'm being haunted. Seriously. By the Ghosts of Failed Decorating specifically the ghosts of this "Wonky Wall." 

Wonky; adj: used to describe an odd shaped or strange occurrence or space often without reason or purpose

Just kidding. I'm pretty sure that's a word my parents made up when I was a kid. But it's totally true! This dumb wall has bothered me for as long as I've owned the house. I think everyone has that one space that is hard to decorate or doesn't make sense and mine is the angled wall in my living room behind the TV area. Here's what it was like from 2008-2012:


I can't ever seem to make it workt. I thought the massive painting was the best but it has never been quite right. I moved the big painting into the dining room where it looks really awesome, and have been working to get the wonky wall dressed up now that the TV stand and TV are in place and look great.

I stole some art out of my bedroom (mirror stars & Colorado art):


And for awhile it stayed like that... empty and bereft of art in the middle. Until one day... I was walking around the Target! We found some killer clearance! My sister and I found these two chevron striped wall hangings for $3.55 a piece! At first I was worried that they would be too "blah" for the space but I think they work because they don't distract you while you are watching TV. We also found they gigantic key at Target for $17.28. Totally sweet! Check em out!


In the far left corner I painted an "A" and an "M" for my sister and I, between the two of the letters I put a $5.00 mirror from Hobby Lobby I've had for a couple years but have never hung up anywhere. The letters I found at Goodwill for $0.79 and spray painted them with a left over gold I had in my arsenal of spray paint. 


Here's the final view of this section! Bye-bye wonky wall! Hello awesomeness!


I'm glad to say that for the most part my living room  project I started wayyyy back at the beginning of 2013. Yeah. It took almost exactly a year. But hey. Check out the updated list!


Living Room ReDo:
  • Consign glass end tables (since craigslist wasn't working)
  • Fix 50" TV from the rents (got new TV)
  • Sell IKEA entertainment stand
  • Build entertainment wall (new TV stand instead)
  • make a decision on wing back chair (reupholster? sell? give away?)
  • New sectional couch
  • New flat weave area rug (more durable)
  • paint ceiling (white)
  • paint walls 
  • paint molding and beam
  • replace doors


Still working on the couch situation but for now, I'd just about call this one a donesies. 

Wall-e

****If you are seeing this content on http://manufacturedhomefacts.com/ please be advised it is there without permission! thismessybusiness.com is the OFFICIAL and only site I publish on!***

Now that I finally have the living room all painted and mostly rearranged I have started changing around the wall art. My attempt this year is to really commit to being creative with wall art. I always feel guilty putting holes in the wall (blame my father) and have to make sure that I am posting 100% of what I want on the walls. Well. All things can be patched and painted. So I'm just going for it!

I started with the front entry wall by the door. It looks even better with the new front door color:


This bike art is from Palisade, Colorado. I am a huge fan of bikes and Colorado and local art so it's pretty fabulous. The art underneath is actually vintage style postcards from a road trip that my family and I took when I was in high school and I finally get to display them!


And I found a happy place for my critter art work! Ode to my furbabies. YayYayy. And of course my wine cork board that is full of wedding and baby shower invites.


#truth.


To the right of the door (pre-painting photo) is one of my favorite paintings and then another little piece of Colorado art...


 From Palisade, Colorado as well... pretty cool right?


Now to just finish this side of the living room... phew. We are slowly but surely getting there!


Oh and just an update on the teacher-job-hunt, I have an interview on Wednesday for a local Charter School. It's not exactly where I imagined I'd be starting my career but it will definitely give me a unique experience that will really encourage my learning as a fledgling teacher. Wish me luck!

Faded by Seven

I've been trying to update little things around my house and outside. You know those little things that you've been putting off for... like ever? Well one of mine is the mailbox outside.  Currently it looks like this:


I haven't figured out exactly why the only number that faded was the "7" but I guess it wasn't so lucky in the sunshine department. For just a few cents (even less with my work discount, chicachicayeahhh) I changed out the number on both sides! Now it looks fresh and inviting. Not so trashy. Yay.


I painted this bench my parents gave me a couple of years ago... looks like I need to get after that again since it is peeling and fading. No one actually sits on it, but it looks less dumpy when it's freshened up. Who knows? Maybe someone will sit on it once it looks pretty!


I need to get around to changing out the light fixture and cleaning up the porch area. Including painting the deck and replacing the faux carpet. Probably taking off the ramp too since it's suffering and starting to collapse. Not safe.


Since I moved all my rocks I planted some pretty flowers, I put pots over them to keep Sebastian from messing with them. Plus we had a random freeze one night. They're doing well now! Yay!


I am so ready for spring time and summer time! At this point I only have 12 more days left of school! That's pretty exciting! I can't wait to have some adventures over the summer and get things done around the house. Yay for that.  :)

Homemade Laundry Soap

With my new found vow to start living smart and single I've been trying to find ways to really save some cash, every little bit helps I think. One thing that I've always wondered about is making my own laundry soap. My Mom tried it once awhile back but she didn't like the recipe she used.

I found this awesome recipe on Pinterest. The author lays out the directions very specifically and I can't stress enough that following those directions closely and exactly makes a huge difference. The recipe calls for three main ingredients (well four if you count water but that's sort of obvious):

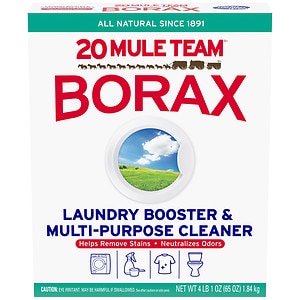
  • 20 Mule Borax ($6)
  • Arm & Hammer Washing Soda (NOT baking soda, very different) ($3)
  • 1 bar of Fels Naptha soap ($1)

(all pictures from Google search, mine sucked lol)

I found all of these ingredients at WalMart except for the Borax, that was at Albertson's for me but they are all in the laundry area. Should be a total of about $10 dollars. Not bad considering a regular size thing of Tide is $12.00. 

I am going to suggest you just go directly to the recipe site{here} because the directions are very long and specific and I don't want to mess them up. 

I will tell you that grating the Fels Naptha soap was the biggest pain in the hinny. I just used a grater that I got at the thrift store so that if it got nasty it wouldn't hurt my feelings. I sat and grated the entire bar and watched about 2 and a half episodes of "The United States of Tara" on NetFlix. So it took a little time but I think it was worth it. 


The mason jar on the blender trick was freakin' fabulous and I will be using it again! I didn't buy lids for my jars (whoops) but here's how mine looked in the end:


I put plastic over the tops and tightened a rubber band around them. So far I've washed a load of whites and a load of colors using this soap and they came out smelling good and looked nice and fresh! I will still use my Woolite Dark on my denim jeans because I love them as dark as possible but so far I have been impressed and I think I will keep making this stuff! Especially since all I would have to buy next time is the Fels Naptha, $1 vs. $12. Easy math even for an English teacher. 


Master-in-Chief Combination

A couple of weeks ago I made the decision to get another roommate in order to help out with some of the expenses. However the room that they would be living in was packed to the rafters in office supplies and furniture.

Somehow I had to fit everything that was in my bedroom and in my office back into my bedroom in an organized fashion. Which is extremely hard when you have a lot of stuff. 

My room was a total disaster during the whole rearranging process, check out the huge mess here:


The desk that I had originally was in a big "L" shape, which I really loved in its spot in the corner of my office. However in my bedroom having that big of a desk took up wayyy too much space. So I decided to detach the corner and the "L" arm and just leave the little part for the monitor and the tower.


Here's an angle of the bookshelf passageway, I hide my printer down on the bottom shelf and wrapped the cords around the back to make it a bit more seamless. So far it's working out okay. I gave the extra part of the desk to my sister for her computer and the chair fits nice and snug at the foot of my bed. I actually really like it!

So does Lucy, it's her new favorite sleeping spot.


Of course it has to get worse before it gets better, check out the chaos on this side!


But I did stack my books all super cute to hide some of the power cords for the computer. I plan on getting some "L" brackets to install into the wall so I can stack even more but it's about desk high right now.


Here's what it looks like at this moment, starting to come together a bit more but still some things that need to be done. For example the mirror sitting on the floor has to go up on the wall and those kind of things. 

Here's the "office corner" right now. I brought my map art from the office into the bedroom.


I love to paint (I painted the big orange flower in the above picture) but storing an easel is kind of hard to do. So I hooked my little one onto the side of the bookshelf. I think it actually looks kind of cool!


Full office corner with bookshelf view:


The lighting got a little weird but here's a shot of the chair and the bed area:


Here is the opposite corner where you can kinda see into the bathroom, I love how it's just one big space now!


There's still some things that I need to work on and organize a little better but so far it's worked out pretty well and as much as I miss my office, I think this will be a smart move.

Bathroom Gallery!

Justin's friend Roger is coming to visit this weekend so I was busy all of Sunday trying to get the house cleaned up and organized for his visit. He'll be the first to try out our new chair-bed!


I have fallen madly in love with the Shark Steam mop that my Mom got for me for Christmas. I use it with this Pledge floor cleaner I've had since I moved in. I have one bottle for wood floors (mine are laminate) and one bottle for tile since all of the tile in the kitchen and bathrooms is only 3 years old. It works amazinggg! It's nice to have the steam mop too because I don't spend all of my time waiting for it to dry since it is instantly dry. Awesome.

I'm just saying. If you don't have one.... you probably need one.

The master bathroom is coming along rather nicely. It is seriously almost done. I'm in love with it too! I have been tossing around a lot of different decorating ideas for the walls. I'm not very good with wall art aside from the canvas' that I paint and then put on the wall. I wanted something that kept in time with the vintage feel once again. So I tossed around the idea of a gallery wall in the space above the tub. It's an odd space:


It definitely needed some character to fill it up a bit. So I used the frames that I showed you before:


I painted all but the yellow frames and the little mirror Krylon Gloss White. I'm all for a little gold but those big frames were a bit ornate for my tastes. They looked great! Sadly I didn't get a picture of that because I decided to paint them at night. Ooops.

I also added in some other art that I had laying around unused. I have began to gain quite the collection of unused pieces. 

But! Check it out after I put it all together! I filled the frames (except for the bottom left and top right, still working on those) with vintage looking images. One of the images is just a page from an old text book about Elizabeth the Great and then of course another piece of map and the bottom right image is from The Graphics Fairy and it's some old antique toothbrushes. Cute right? The image in the center is one of the fist pictures I bought for my house. I like it because its a red head. I won't lie.


I'm trying to decide if I want to paint the top two wooden frames white or not. One of em is a mirror that I would have to tape off to paint (which means work) and the other one would be fairly simple. What do you think? White? Brown?


This is the fantastic find that I bought at Salvation Army. Sooo cute. I don't know if it was hand made but it was definitely the inspiration for the entire wall!


Yes that is my pink hammer. Mahahahah. My old roommate got me an entire pink tool set for Christmas last year. It's like they know or something. I still need to work on the window covering situation. Justin has that on his "honey-do" list for this week before Roger gets here. I'm pretty excited about the upgrades in the bathroom. I would anticipate a full reveal within the next or so! Yay!


The entire cost of the new wall? 

3.24 for Krylon spray paint
6.99 for all but two frames (and those other frames were free since I had them already)
______
10.23 Total! Whata bargain.