Showing posts with label living single. Show all posts

Kitchen Botox

Have you ever done one of those DIY remodeling things and had to cut something out of the budget, even though you knew eventually you were going to end up replacing it anyway? Well. That is the case in my kitchen. Back in December of 2011 when I first started remodeling the kitchen I had a very small budget. Like $300.00 dollars budget. For a college kid not bad and for the most part it has held up rather well.

For instance the cabinets used to all look like this: 


They were so dated. Being the English nerd I am I always feel compelled to hum a little Poe; "Once upon a midnight dreary while I wandered weak and weary." I just feel it describes the mood in the kitchen so well. Several gallons of white paint and elbow grease I was able to paint them white and pretty which made them look wayyyyy better. Not to mention painting the existing hardware a few years ago.


I have always hated the pink counter tops that were original to the house, which was built in the late '80s. They're older than me. So I used some counter top paint product, which has actually lasted pretty well since then. This was my scared face....


Here's what it looked like after all the paint was dried and applied:


The counters have held up pretty well in terms of the paint, I mean it has some wear and tear from hard use by roommates and just time. The problem with these counters is that they are rotting and sagging. So much that in one point from the wall to the end of the counter top there is a 3/4" slope by the sink and everywhere else a 1/4" slope. I was finally able to put some money away and save up for new counters.

Here's a demonstration with just my mini baby level.


So with the image of my present kitchen in mind and the overall theme and colors in my house... I headed off to the home improvement stores to start my journey...


I was super excited! It was painful and I spent probably 2 hours in home improvement stores on a glorious Saturday deliberating between whether or not to actually buy them. I had to call my sister into the store to help push me to do it. I decided to go with a pre-fab laminate product because it's a small galley kitchen which means I only needed to buy a 6' piece and a 4' piece to cover all the counter top space. Plus if I have a manufactured home it wouldn't be smart/practical/logical to pay for real stone, just to be honest on that score.

I was between two different counters, dark granite-y looking stuff, or light granite-y looking.


I went with the lighter. The reason being that with the dark counters I already have it felt to dark for such a small space, I am hoping with the light color it will make the space look larger and fit better with the classy, chic cottage thing I've got going on.


The nice fellers at Lowe's helped us get them loaded into the truck that my Dad's friend, Tony, brought to help me out. It was super nice of him! He's even going to help me install them! They look clean and fresh in the sun!

Total cost break down for the counter tops:
  • 6 foot section: $120.00
  • 4 foot section: $92.00
Discount: $22.00

Total Cost of Counters: 205.00

Not too bad really, when you think about it. I also bought a new thing of oil-rubbed bronze spray paint for the cabinet hardware, since I'm giving the whole thing a new face, I may as well touch those up as well. Plus a new faucet that is a bit taller is going in, even though I'm just going to refit the existing stainless steel sink. There's no point buying a new one since the cabinet is so small it's not like I can fit a deeper one.

I'm pretty excited! They should be installed within the next couple weeks!


Trailerhood Curb Appeal

****If you are seeing this content on http://manufacturedhomefacts.com/ please be advised it is there without permission! thismessybusiness.com is the OFFICIAL and only site I publish on!***


I'm still working hard on fixing up my trailer in order to get some serious "detrashing" done. We've really made some progress so far. If you're just joining our mission check out where we started by going herehere, and here. The overall mission is to embrace the trailer. Can I get some "whooosaaahhhs?" 

Anyways! One of the biggest things that makes a trailerhood a trailer park is the fact that traditionally the exterior care of a home is lacking. Like severely. So that's what we've been working on here.


Every year I set aside about $50.00 to spend on flowers (no more than that because annuals die.) But check out the difference some well placed potted plants make when you're walking up the front steps. I bought all of my plants at a local nursery called Bookcliff Gardens. Those are sweet potato vines and spreading petunias. I think. I am not a flower expert. They were pretty. 


Last time I talked about taking the time to repaint your porch and anything else. Check it out. No peeling paint. Makes a difference. Want to see the before again? Look in the bottom left hand corner...


And now:


Totally better!

Another way to help keep your trailer (or any home really) looking sparkly is to maintain flower beds. Don't let the weeds take over and make things all nasty. Also, ignore all the hoses, I don't have a sprinkler system, too much concrete separating each of the sections of grass. Not worth it. Another thing to do is to change out the mulch once it starts looking nasty. Too expensive you say? Well at Lowe's we tend to have it on sale 4 bags for $10. That's like $3.00 a bag. It's cheap.


Keep your outdoor furniture maintained. For me that means making sure the furniture on my front porch are spray painted thoroughly every couple of years (didn't have to this year, thank all things happy) and my bench outside. This year it needed a lot of work because most of the paint was peeling. But now it looks fresh and pretty!


Maintain your hedges and keep weeds from growing up along the chain link fences that are notorious in trailer parks. Don't have a weed eater or lawn mower? Believe me there is probably a nice elderly couple who is upset about how your yard looks that would let you use theirs, or heck even do it for you. Make friends.


If you have to store stuff outside put it in cute and clever storage containers. Don't pile your garbage outside, interior furniture should stay in the interior, no one wants to see that ugly couch outside.


Feel free to add any other tips or comments about lawn maintenance. What tricks have you learned during your home-ownership adventures that may help us out?

DeTrashing the Trailerhood: Strip it Down

****If you are seeing this content on http://manufacturedhomefacts.com/ please be advised it is there without permission! thismessybusiness.com is the OFFICIAL and only site I publish on!***

Part of de-trashing the trailerhood is focusing on keeping the exterior looking good. Let's face it, whether it's a stick built home, brick house, or mansion; peeling paint, destroyed furniture, and garbage never look good. At all. 

So keep it clean. That means more then just putting the trash in the can, though that is certainly a great step.


Here's what my front porch looks like all kinds of naked:


A few things that I need to do out here:
  • sweep off the carpeted part of the porch (though that carpet needs to be replaced badly)
  • wash off the patio furniture
  • get the cobwebs out from around the door and by the rafters
  • clean the deck 
  • scrap the peeling paint and repair (a Realtor told me that peeling paint ANYWHERE hinders your appraisal value)

Check out how dirty this is. Gross.


I just used soap and an old rag to scrub down the porch prior to painting, since paint and dirt never stick well together. Here's an example of where the porch is peeling paint:


I have had this same gallon of exterior white paint since the first year I lived in this house. It cost me $15.00 and I use a little bit of it every year repairing the damage from the winter season. I can't stress how important it is to do this type of maintenance every year. It adds value to the property of course, but it also makes you feel more invested.


It rained when I was trying to do my "after" pictures. I'm talking rolling thunder that shook the house rain (thankfully my paint was totally dry) so I'll be back soon with those also! But it is looking way better then it was!

Feel free to comment with any other tips and tricks you may have for de-trashing a trailerhood!


Oh, and just a side note update. The reason that this post was so late was because I lost out on another teaching job and was super duper sad about it. (I'm talking 6 pack and cookies while watching movies sad.) I've interviewed for three different teaching positions and haven't gotten any of them. :(  The secondary English market is pretty competitive where I am at, so I appreciate any prayers, finger crossing, rain dancing, etc. that something might open up for me here soon. It also means I may not get to have an office because subbing isn't enough to live on. 

De-Trash Your Trailerhood: Manage It.

****If you are seeing this content on http://manufacturedhomefacts.com/ please be advised it is there without permission! thismessybusiness.com is the OFFICIAL and only site I publish on!***

Here is the first phase of our mission to start de-trashing the trailerhood, or rather, my trailerhood but these are applicable anywhere I'd say. Keep in mind that as we do this some of our steps may get out of order depending on what we are working on.

When I first moved into my trailer it looked straight up trailerhood (for the duration I will be saying "hood" but I mean that in terms of a trailer park/manufactured home community).

Here's a little reminder:


I don't have very many original pictures since it was not my original plan to start a blog. I know. That was dumb. I'm kicking myself for it now. But you can sort of see that the wood is rotting in places, the stairs are weird, there was rotting lattice attached to the porch and some of the flashing was gone from the roof overhang.

Here's what it looks like presently:


You can see even in this picture that the grass is over grown, the rails are filthy, and my aspen tree is totally dead.


Even this big mulberry bush is trying to escape from the picture.


Porch is cluttered with planting materials and is very, very dirty.


This side wasn't so bad even though all the paint was peeling off my bench and it was looking a little wonky.


Loads of cobwebs all around the front entry is also not very inviting. It works out okay on Halloween though!


The main point of showing these somewhat embarrassing photos of my house is that maintaining your exterior is crucial! It not only adds value to your home but also increases the curb appeal, and allows you to identify potential issues early on rather than waiting for it to totally fall apart. 

So for a total investment of $0.00 dollars we are going to start our detrashing by cleaning up the outside of the house considering that is the first thing people see when they drive by, and often the only thing.

To-do list:

  • Mow the lawn
  • Pull weeds that are mega tall.
  • Fill containers with pretty flowers
  • Repaint the peeling paint on the deck.
  • Clean off the cobwebs 
  • Replace the icky light
  • Repaint the bench and clean furniture.
Keep in mind that water is (nearly) free, you can get a decent broom at the dollar store, and if you have to buy paint you can get it for only $15 dollars at Lowe's or even WalMart.

Check back on Friday and I'll show you the steps I've taken so far!


Living Single: Monthly Update

Back in March I started talking about how I wanted to start working towards financial freedom, especially since I'm now out of college and don't have that extra interest backed cash coming in every few months. (High five to those student loans!) What is starting to become a challenge is the fact that those student loans have to be paid back.

I know. Crazy. I don't remember being told that. Damnit.

So I have heard a lot of buzz around about Dave Ramsey and even recall my parents following his lead when I was a kid. I found his website {here} and found a lot of great advice. I wanted to know more! So I used my fabulous Google Chrome set up, seriously, I heart the Googlie; and found a ton of videos online.


I spent all morning on Sunday watching these videos and getting some great tips and steps to success. One thing that I noticed is that though a lot of his info is tailored to families and people in relationships (#singleladyfun) there's some things that I can incorporate into the single lady life I'm living.

For instance setting up a budget. My new favorite thing is Google Drive. You can create all kinds of documents just through Google without having to buy expensive software that if you're like me, you can't really afford at the moment. Plus it's fairly dumdum proof which I appreciate.


In my Google drive I set up a folder for all my "budget" goodies. Everything from paying off student loans, car, credit card debt, monthly budget, and a spending register. However I have no clue how to use or set up a spreadsheet.... I'm an English teacher... numbers are not me friend.


So in the truest nature of Google... I googled it! Managed to find some great resources and even found a preloaded spreadsheet that you can modify and fill in the blanks with your amounts, etc. (Shown in screenshot above) Here's the link if you want to try it out for yourself: Budget Spreadsheet


This page explains how to use the budget planner and even gives a pretty thorough tutorial if you need it. Plus it's just a great website for people like me who are starting out and want to get ahead in this money game. Check it out here: 20somethingfinance.com

For my debt repayment spreadsheets (sorry no screenshot) I used this one: Cardan Avalanche Spreadsheet. It was great because it allowed you to put in the interest rates and see how paying extra has an IMMEDIATE impact. For example if I pay even an extra $100-$200 on my student loans each month I end up saving a couple THOUSAND dollars in interest over the life of all of my student loans which is roughly 15 years for the federal loans.

Plus the handy thing about Google Drive... They've got an app for that! This is what it looks like on my Samsung Galaxy SIII. Of course my phone is an android or Google based phone which makes it easier but the app is free and easy to use, the larger documents take longer to load if you're not on WiFi but it you are using the register to track your purchases it's handy so you can just get on it, add it in, done.

I am a girl that loves clothes, shoes, nail polish, purses, and buying dog treats and toys. So for me the hardest part of this whole process has been just simply doing this:


I think if I can demonstrate enough discipline I can do it. I know I can do it, but it's not going to be easy. If you have any tips/tricks/words of wisdom or advice. Please feel free to share! I'm all ears. 


*PS. Google didn't ask me to do any of this. I was just sharing awesome things I found, for free, that work. :)


Insta-ness

This has been a pretty wild month and I thought that I would send out a little shout to my favorite app of all time... Instagram! I love it totally. I'm constantly snapping pictures with my doggie and kittans. Here's a grid of just a few of my favorites:


I know it's a little crazy that I included a picture of a boy up there at the top but he's really nice and I like him. So we'll see. But my birthday celebration was a total blast... I ended up having a better time at that then at my 21st birthday party! Pretty fabulous. Pouka has been working on her bloggy skills while I've been teaching and working on some major house projects!


Here's a picture from my birthday of my awesome-somewhat-inappropriate-tiara...


This is how we spend late nights at our house... painting nails and napping...


More pup pictures!


Hope everyone is having a happy Wednesday so far! Feel free to follow me on the ole instagram action (user name @missmcds) Yay!

Homemade Laundry Soap

With my new found vow to start living smart and single I've been trying to find ways to really save some cash, every little bit helps I think. One thing that I've always wondered about is making my own laundry soap. My Mom tried it once awhile back but she didn't like the recipe she used.

I found this awesome recipe on Pinterest. The author lays out the directions very specifically and I can't stress enough that following those directions closely and exactly makes a huge difference. The recipe calls for three main ingredients (well four if you count water but that's sort of obvious):

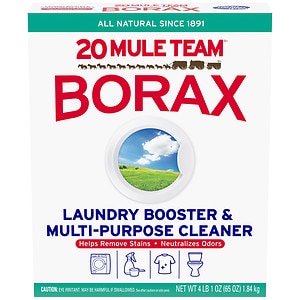
  • 20 Mule Borax ($6)
  • Arm & Hammer Washing Soda (NOT baking soda, very different) ($3)
  • 1 bar of Fels Naptha soap ($1)

(all pictures from Google search, mine sucked lol)

I found all of these ingredients at WalMart except for the Borax, that was at Albertson's for me but they are all in the laundry area. Should be a total of about $10 dollars. Not bad considering a regular size thing of Tide is $12.00. 

I am going to suggest you just go directly to the recipe site{here} because the directions are very long and specific and I don't want to mess them up. 

I will tell you that grating the Fels Naptha soap was the biggest pain in the hinny. I just used a grater that I got at the thrift store so that if it got nasty it wouldn't hurt my feelings. I sat and grated the entire bar and watched about 2 and a half episodes of "The United States of Tara" on NetFlix. So it took a little time but I think it was worth it. 


The mason jar on the blender trick was freakin' fabulous and I will be using it again! I didn't buy lids for my jars (whoops) but here's how mine looked in the end:


I put plastic over the tops and tightened a rubber band around them. So far I've washed a load of whites and a load of colors using this soap and they came out smelling good and looked nice and fresh! I will still use my Woolite Dark on my denim jeans because I love them as dark as possible but so far I have been impressed and I think I will keep making this stuff! Especially since all I would have to buy next time is the Fels Naptha, $1 vs. $12. Easy math even for an English teacher. 


Colorado Adventures

The most amazing part of being graduated is that even with two jobs I finally have time to enjoy the beautiful country I live in! My roommate Jennifer and I decided to go on a hike one day to a trail called "Devil's Kitchen" on the Colorado National Monument. 


This is as you go up towards what we dubbed as the "oven."


The wide sweeping view of the valley that I call home!


Jennifer likes to get all up in and around the rocks.


I climbed up on top of this big ole sandstone rock (notice the difference in our clothing choices? haha)


Wow. So beautiful. I love it!


My "I love Colorado" moment... haha


Rock climbing with no make up on. We named that rock Steve, you had to love Steve to get up to the next point.


There's definitely a reason they call it colorful Colorado. 
It is so glorious to live in a place like this where I can have an active lifestyle and a natural jungle gym just outside my door.